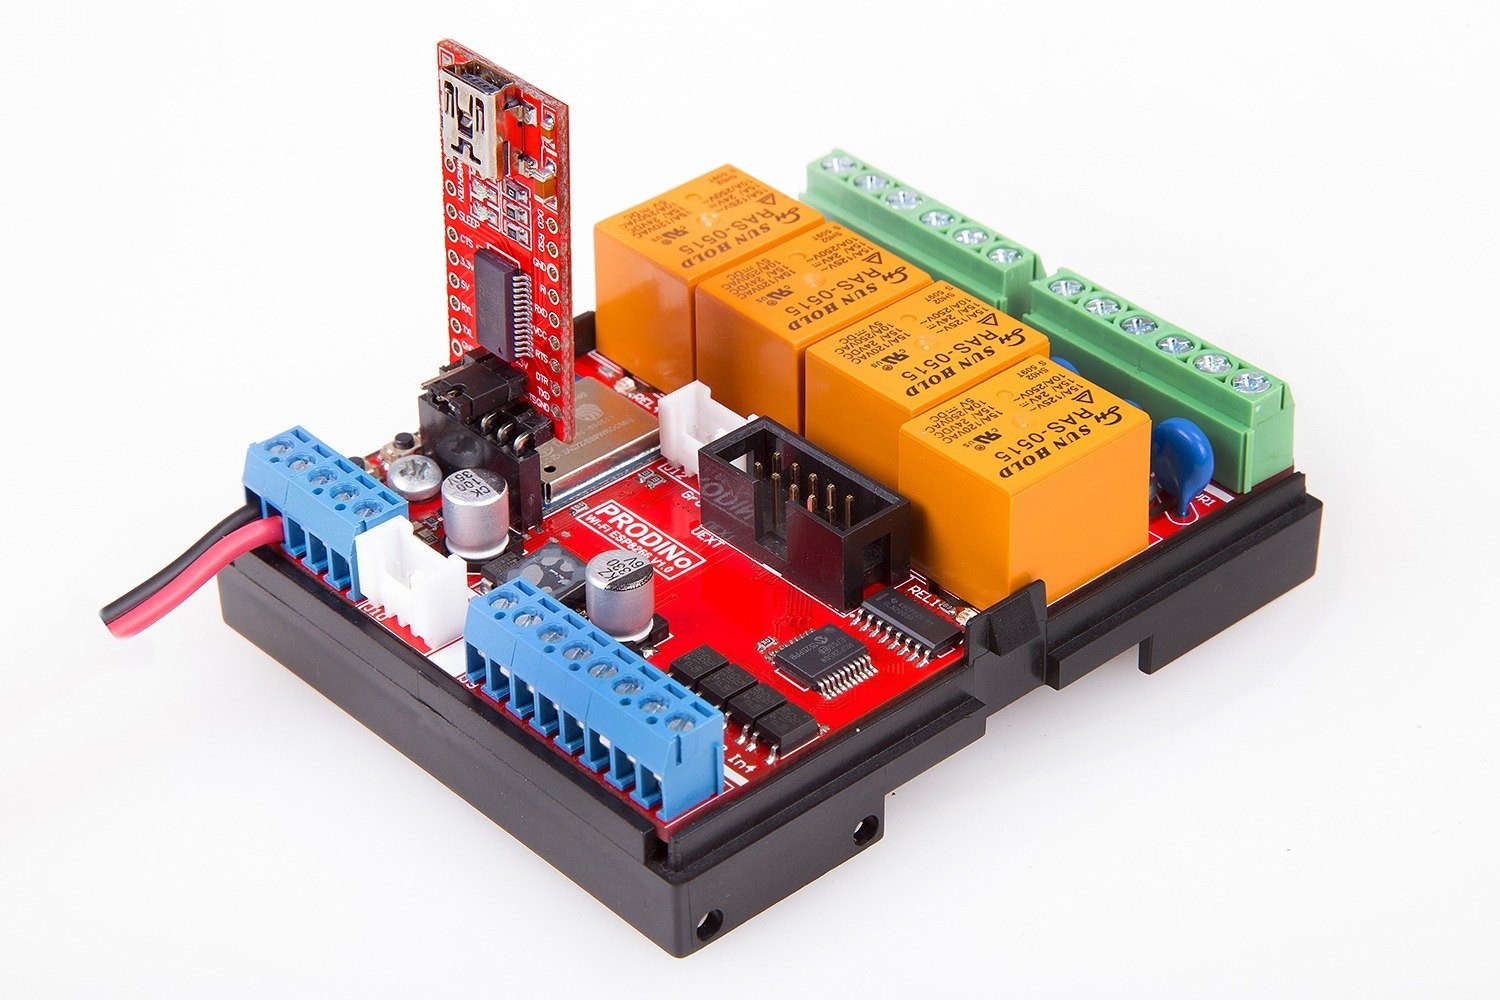
PRODINo WIFI-ESP WROOM-02
Tutorial
In this ProDino WiFi tutorial will help you to start with your ProDino WiFi board. The board details...
Table of Contents:
How to install the board and the examples
1. Opening the Arduino IDE
From a menu select File/Preferences

2. Pressing over the red highlighted button

3. In the window paste
the link: http://arduino.esp8266.com/stable/package_esp8266com_index.json as shown below:

Pressing OK and again OK.
4. Select Tools/Board: "xxxxxx"/Boards Manager...

5. You should find the board "esp8266 by ESP8266 Community" and then press "Install"

Close the window.
6. Selecting Tools/Board: "xxxxxx", "Generic ESP8266 Module"

7. A board settings should be following:
(exclude Port, it is specific per your computer)

8. Installing the board library:
- 1Downloading and save the file "PRODINoESP8266.zip"on your desktop.
- 2Opening your Arduino IDE. From the menu select: Sketch > Include Library > Add .ZIP Library...
- 3Select the zip file "PRODINoESP8266.zip" from your desktop and click Open.
- 4You can see our examples in: File > Examples > (Section: Examples from Custom Libraries) PRODINo_WiFi-ESP_WROOM-02
Flashing firmware on the device
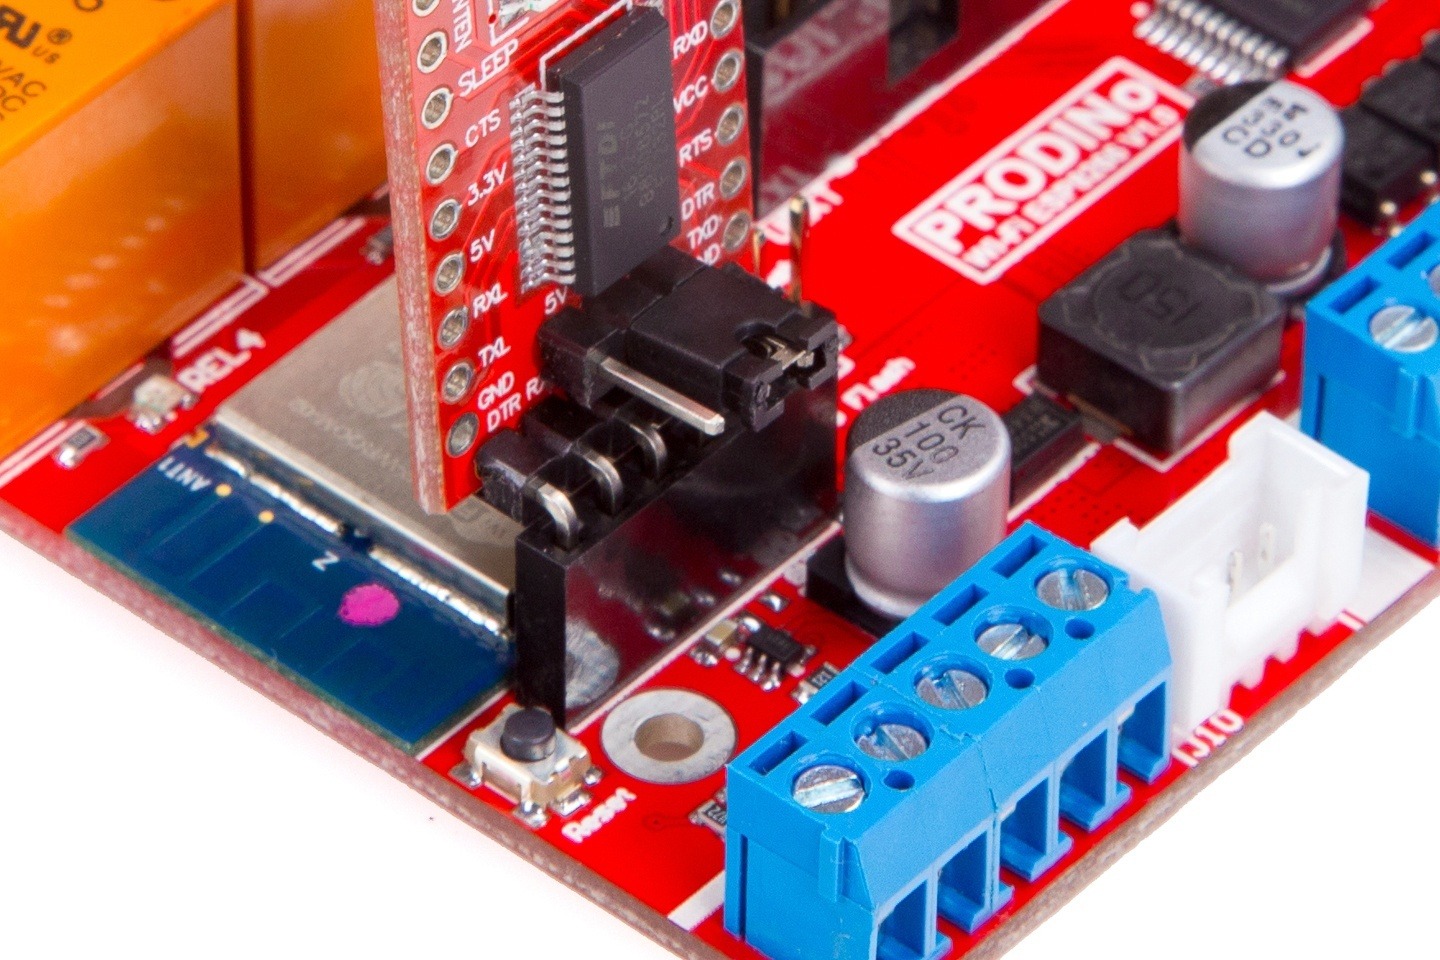
Get an Arduino programmer and debugger
Look like this:

Attention! If the programmer has a voltage selector 3.3V and 5.0V you have to set it to 3.3V!
Please check. The device will be damage if it set on 5.0V.
If the programmer supplied from us it set to 3.3V.
Powering the device
On the picture these are a red and a black cables.

Plug the programmer into J1 connector
Attention! The GND on the programmer has to be in right position.

Press and hold the Flash button

The steps:
- 1Powering the device
- 2Linking a programmer with a computer through USB cable
- 3In the Arduino IDE set your Programmer port from menu Tools/Port
- 4Plug the programmer into J1 connector
- 5Click Verify
- 6Press and hold a Flash button (B2) on the board. Click Upload
- 7After starting flash couple of programmer's LEDs, you may release the button